It creates a naked M5AtomLiteS3. That is you do not need to drag and drop the drivers for the features of the device. You will upload a config file and you are done.
The M5AtomLiteS3 has a little more RAM then the M5AtomLite but a lot more flash(8MB). It will run OTA. If you have memory hungry applications you may want to consider the M5Core2.
- What you need
- Installation Software
- Operation
- Code Appendix
What you need
Installation Software
Getting Started with TipControl Designer and AtomLite
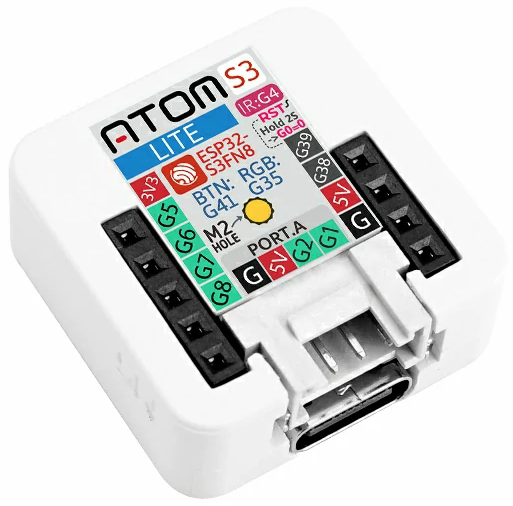
- 🛠️ Connect Your Device Launch TipControl Designer and plug in your AtomLiteS3 via USB. Make sure the correct USB driver is installed for your system. If you’re unsure, refer to the Tutorials section for help with firmwareinstallation and USB setup. Rename the device and the device will restart.
- Restore Configuration
- Right-click on your newly detected device and select “Configuration Restore.”
- Navigate to:
Documents/TipControl/backups/M5/AtomLiteS3.imgand choose the file named AtomLiteS3. Wait till the restore process finished. - Reset the chip if not done automatically. Wait a few seconds.
- Scan & Rename
- Perform a device scan again.
- Click on the new device and rename it from
M5_AtomLiteS3.cpyto your preferred name.
- Configure Wi-Fi
- Click the wifi driver and open the Config Tab and enter your Wi-Fi credentials.
- Configure MQTT
- Click mqtt Config Tab, enter the password you used during cloud registration.
- The username is your registered cloud username.
- If you only have one user, you can leave the User field blank.
- Click Save to apply the settings.
- ✅ Preconfigured Features Your device already comes with I2C, button, Neopixel, and other essential components configured—no extra setup needed!
Operation
- Button
Code Apendix
- Events
- button
- pressed – changes the lead to red
- released – turns led off
- sys
- “Timer” – sends a report to your *.designer
- “Equ_enabled” – calls a macro open
- button
- Macros
- multireport – change “username” to your user name and save it. It sends the data from the button, neopixel and rtc to the designer. Event “Timer” must be enabled. For RTC to work you must have a wifi connection.
- open – on boot play a led show